


September 7, 2026
The Complete Room-by-Room Cleaning Standard Used by Perth Property Managers
Moving out of a rental property is about more than packing boxes and returning the keys. One of the most important final steps is leaving the property clean, presentable and ready for the next occupant.
For many tenants, this is where uncertainty starts. How clean is clean enough? Should the oven be spotless? Do windows need cleaning? What about skirting boards, bathroom grout, cupboards, outdoor areas or small marks on walls?
These questions matter because property managers generally assess the condition of a rental against the property’s condition at the beginning of the tenancy, allowing for reasonable wear and tear. A rushed surface clean can therefore leave tenants facing avoidable follow-up work, delays or disputes.
This room-by-room guide explains what a thorough End of Tenancy Cleaning Perth checklist can look like from a property-management perspective. It focuses on practical cleaning standards rather than simply making a property look tidy.
Whether you are a tenant preparing for a final inspection, a landlord preparing for a new occupant, or someone comparing Perth End of Lease Cleaning options, the goal is the same: understand what a genuinely complete move-out clean involves.
Why Cleaning Standards Matter at the End of a Tenancy
A rental inspection is not usually based on whether a property looks good from several metres away. Property managers may inspect details that are easy to overlook during an ordinary weekly clean.
During a final inspection, attention can move from the obvious areas—floors, benches and bathrooms—to smaller details such as:
- Dust accumulated on skirting boards
- Grease around cooking surfaces
- Residue inside cupboards
- Hair and soap deposits around bathroom fixtures
- Dust on ceiling fans and light fittings
- Marks around switches and door handles
- Dirt in corners and behind doors
- Built-up grime in window tracks
- Cobwebs around ceilings and outdoor areas
- Weeds, leaves or rubbish around external areas
This is why an effective end-of-tenancy clean needs a different approach from routine household cleaning.
A weekly clean is designed to maintain a property. A move-out clean is designed to reset the property to a clean, inspection-ready condition.
That distinction is important.
Cleaning Standards: What Property Managers Commonly Look For
There is no single universal cleaning checklist that applies identically to every Perth rental. The required work can vary according to the tenancy agreement, property condition report, property type and expectations established at the start of the tenancy.
However, a professional inspection commonly considers whether the property has been cleaned thoroughly across all accessible areas.
A useful way to think about the standard is:
Clean, dry, free from avoidable dirt and reasonably consistent with the property’s condition when the tenancy began, allowing for fair wear and tear.
This means tenants should not concentrate only on highly visible surfaces.
For example, a kitchen bench may look clean while the rangehood filter, oven interior, cupboard handles and splashback still contain grease. From an inspection perspective, the kitchen has not really been fully cleaned.
The same principle applies throughout the property.
1. Kitchen Standards: The Area Most Likely to Need Detail
The kitchen is often one of the most demanding rooms during an end-of-tenancy clean because cooking naturally creates grease, food residue and accumulated grime.
Kitchen surfaces and cupboards
Start with the obvious surfaces, then work into the details.
Clean:
- Benchtops
- Splashbacks
- Cabinet doors
- Cabinet handles
- Drawer fronts
- Shelving
- Cupboard interiors
- Pantry shelves
- Areas beneath the sink
- Wall surfaces where appropriate
- Skirting boards
- Corners and edges
Pay particular attention to handles and areas around frequently used cupboards. These can accumulate a surprising amount of grease and fingerprints.
Oven and cooktop
The oven deserves special attention.
A thorough clean should address:
- Oven interior
- Oven door glass
- Racks
- Trays
- Cooktop surface
- Burner areas where applicable
- Knobs and controls
- Grease around the surrounding surfaces
A common mistake is cleaning the outside of the oven while leaving baked-on residue inside.
If the oven has heavy carbonised deposits, allow adequate time for the cleaning product to work rather than aggressively scraping surfaces that could be damaged.
Rangehood
Do not forget the rangehood.
Wipe the external surfaces and controls and clean the accessible filter according to the manufacturer’s instructions. Grease accumulation around the rangehood is particularly noticeable under bright kitchen lighting.
Sink and tapware
The sink should be free from food residue, soap deposits and visible grime.
Clean around:
- Tap bases
- Sink edges
- Drain areas
- Overflow openings
- Splash zones
- Silicone joints
A clean sink should not simply be wet and shiny. It should be free from residue and unpleasant odours.
2. Bathroom Standards: Hygiene, Grout and Detail
Bathrooms are another area where a property’s cleanliness becomes immediately visible.
A bathroom can appear clean while still containing soap scum, hair, mineral deposits or mould-like staining in less obvious areas.
Shower and bath
Clean:
- Shower screens
- Shower walls
- Tiles
- Grout
- Shower fittings
- Tapware
- Bath surfaces
- Plug and drain areas
- Silicone edges where accessible
Hard-water deposits can be particularly stubborn. They may require an appropriate descaling product and sufficient dwell time rather than simple wiping.
Always use cleaning products that are suitable for the surface. Natural stone, for example, can be damaged by inappropriate acidic products.
Toilet
Clean the toilet thoroughly, including:
- Bowl
- Seat
- Lid
- Hinges
- Exterior
- Base
- Flush controls
- Surrounding floor
The area behind and around the toilet is easy to overlook but can collect dust and hair.
Vanity and mirrors
Clean the vanity top, basin, taps, cabinet fronts and accessible storage areas.
Mirrors should be cleaned without leaving streaks or cleaning-product residue.
Ventilation and small details
Check exhaust fan covers, light fittings and accessible vents for accumulated dust.
Also inspect:
- Door handles
- Light switches
- Skirting boards
- Corners
- Behind doors
A bathroom inspection is often about these small details as much as the major surfaces.
3. Living Area Cleaning: Beyond Vacuuming the Floor
Living rooms, hallways, dining areas and bedrooms are generally less greasy than kitchens, but they contain many overlooked dust-collecting surfaces.
Dust from top to bottom
An effective method is to clean from higher surfaces downward.
Depending on the property, this may include:
- Ceiling fans
- Light fittings
- Air-conditioning vents
- Cornices
- Door frames
- Shelving
- Built-in wardrobes
- Skirting boards
- Window sills
There is little point vacuuming a floor first if dust from ceiling fans and ledges is going to fall onto it later.
Walls and doors
Check walls for removable marks, especially around:
- Light switches
- Door handles
- Hallways
- Children’s areas
- Frequently used doors
Do not automatically use abrasive products on painted walls. Some paint finishes can become visibly damaged from aggressive scrubbing.
Floors and carpets
Hard floors should be vacuumed and mopped using a method appropriate for the flooring material.
Carpets require careful vacuuming, particularly around:
- Room edges
- Corners
- Under accessible furniture
- Wardrobe entrances
- Hallways
If the property has carpets with significant staining, check the tenancy agreement and original condition report before deciding whether professional carpet treatment is required.
4. Bedrooms and Built-In Storage
Bedrooms are sometimes cleaned quickly because they generally have less obvious dirt. That can be a mistake.
Inspect:
- Floors
- Skirting boards
- Doors
- Handles
- Wardrobe doors
- Wardrobe interiors
- Shelves
- Window sills
- Ceiling fans
- Light fittings
- Accessible areas behind doors
Built-in wardrobes deserve particular attention.
A tenant may remove all belongings and assume the job is complete, only to leave dust, hair or small debris on wardrobe shelves and floors.
Empty storage spaces should be cleaned as carefully as the rest of the room.
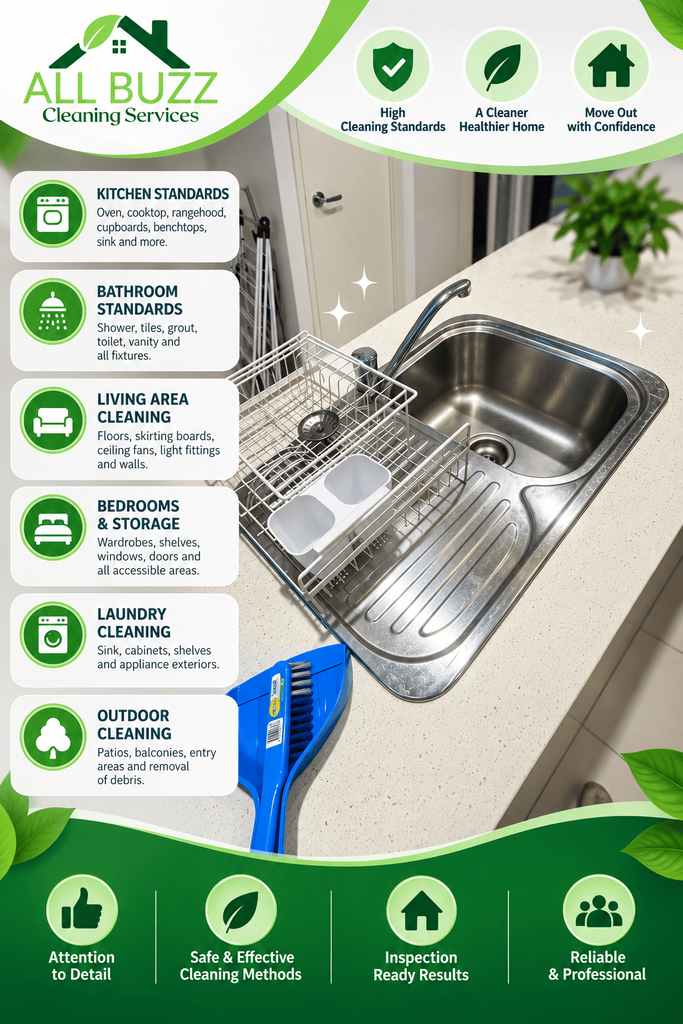
5. Windows, Glass and Tracks
Windows can strongly affect the overall impression of a property because natural light makes dirt and streaks easier to see.
Where cleaning is reasonably accessible and included within the required scope, consider:
- Internal glass
- Window frames
- Sills
- Tracks
- Flyscreens
- Sliding-door tracks
Window tracks are particularly easy to miss.
Use a vacuum or suitable brush to remove loose debris before wiping. Trying to wipe thick, dry dirt immediately can turn it into muddy residue.
External window cleaning can involve safety risks, especially for upper-storey windows. Never place yourself in an unsafe position simply to reach glass. Professional equipment or appropriate access may be necessary.
6. Laundry and Utility Areas
Laundry areas may be small, but they can accumulate lint, detergent residue and dust.
Clean:
- Laundry sink
- Tapware
- Benchtops
- Cabinet fronts
- Cupboards
- Shelves
- Floors
- Skirting boards
- Accessible areas around appliances
If the washing machine is part of the rental property, clean accessible external surfaces and check whether the appliance has a manufacturer-recommended cleaning procedure.
Dryers should have lint filters emptied and cleaned appropriately.
7. Outdoor Cleaning: Often Forgotten Until Inspection Day
Outdoor areas can be overlooked because tenants naturally focus on indoor cleaning.
However, balconies, courtyards, patios, garages and entry areas may form part of the final inspection.
Outdoor Cleaning may include:
- Sweeping floors
- Removing leaves
- Removing rubbish
- Cleaning accessible surfaces
- Clearing obvious debris
- Cleaning entry areas
- Removing cobwebs
- Tidying applicable outdoor spaces
For properties with gardens, the required level of gardening work depends on the tenancy arrangement and original condition.
Do not assume that a tenant is responsible for restoring a garden beyond reasonable maintenance expectations. Compare the current condition with the original condition report and tenancy obligations.
A Practical Room-by-Room End-of-Tenancy Checklist
Before returning the keys, walk through the property systematically.
Kitchen
- Benches cleaned
- Splashback cleaned
- Cupboards and drawers cleaned
- Oven cleaned
- Cooktop cleaned
- Rangehood cleaned
- Sink and taps cleaned
- Floors vacuumed and mopped
- Skirting boards dusted
Bathrooms
- Shower cleaned
- Shower glass cleaned
- Grout checked
- Bath cleaned
- Toilet cleaned thoroughly
- Vanity cleaned
- Mirrors cleaned
- Floors cleaned
- Exhaust fan area dusted
Bedrooms and Living Areas
- Floors cleaned
- Skirting boards dusted
- Doors and handles cleaned
- Wardrobes emptied and cleaned
- Window sills cleaned
- Ceiling fans dusted
- Light fittings checked
- Cobwebs removed
Laundry
- Sink cleaned
- Cabinets cleaned
- Shelves cleaned
- Floors cleaned
- Appliance exteriors checked
Outdoor Areas
- Leaves removed
- Floors swept
- Rubbish removed
- Entry areas cleaned
- Cobwebs removed
- Applicable garden maintenance completed
Common End-of-Lease Cleaning Mistakes
Even tenants who clean regularly can miss important details when moving out.
Mistake 1: Cleaning Only What Is at Eye Level
Inspection does not stop at countertops and floors.
Better approach: Look up, down and behind. Check ceiling fans, skirting boards, cupboard interiors, door frames and corners.
Mistake 2: Leaving the Oven Until the Last Hour
Oven grease can take significantly longer to remove than ordinary surface dirt.
Better approach: Start the oven early so cleaning products have enough time to work safely.
Mistake 3: Treating “Tidy” as “Clean”
Removing furniture and rubbish does not automatically mean the room is clean.
Better approach: After the property is empty, perform another inspection. Empty rooms often reveal dust and marks that furniture previously concealed.
Mistake 4: Using the Wrong Cleaning Product
More aggressive chemicals do not necessarily produce better results.
Some materials can be damaged by abrasive pads, strong acids, solvents or excessive moisture.
Better approach: Identify the surface first and follow manufacturer recommendations where available.
Mistake 5: Ignoring the Original Condition Report
This is one of the most important practical points.
A tenant should understand the property’s starting condition before attempting to determine what needs to be restored.
Reasonable wear and tear is different from accumulated dirt or damage. The original condition report provides valuable context.
How to Make Professional End of Lease Cleaning Perth More Effective
If you choose professional end of lease cleaning Perth, the quality of the result depends heavily on preparation and communication.
Before the cleaners arrive:
- Remove personal belongings.
- Empty cupboards and wardrobes.
- Remove rubbish.
- Defrost and empty applicable appliances.
- Identify areas needing special attention.
- Keep water and electricity available where required.
- Provide access instructions.
- Check whether carpets, windows or outdoor areas require separate treatment.
- Keep the original condition report available for comparison.
A professional cleaner can work much more efficiently when the property is completely accessible.
For example, cleaning an empty kitchen is considerably easier than trying to clean around boxes, utensils and appliances that are still being packed.
Experience-Based Tip: Do a Final Inspection in Daylight
One of the simplest techniques is also one of the most effective.
After cleaning, inspect the property during daylight if possible.
Natural light can reveal:
- Streaks on windows
- Grease on cabinet doors
- Dust on skirting boards
- Marks on walls
- Residue on mirrors
- Dirt in corners
Then switch on the property’s lights and check again.
Different lighting conditions expose different problems.
This approach is particularly useful when preparing a property for a final inspection because it encourages you to assess the home as an inspector might rather than as someone who has become accustomed to seeing it every day.
What “Clean” Does Not Automatically Mean
It is important to separate cleaning from repairs.
Cleaning may remove ordinary dirt, dust, grease and residue. It does not necessarily correct:
- Broken fixtures
- Damaged flooring
- Large wall damage
- Cracked tiles
- Missing fittings
- Permanent stains
- Structural problems
If something is damaged, document it and raise it through the appropriate tenancy or property-management process rather than attempting an unsuitable DIY repair.
Likewise, avoid trying to hide damage with paint, chemicals or excessive scrubbing.
Transparency is generally safer than making a problem worse.
When Should You Start an End-of-Tenancy Clean?
Do not leave the entire job until the morning you hand back the keys.
A practical schedule is:
3–7 days before moving out
Begin deep-cleaning areas that are no longer being used regularly.
1–2 days before
Clean the kitchen, bathrooms, wardrobes and remaining rooms as belongings are removed.
Final day
Complete floors, rubbish removal, final surfaces and last-minute checks.
Before key handover
Walk through every room using your checklist and compare the property against the original condition report.
This reduces the risk of discovering a forgotten task when you are already under time pressure.
Final Thoughts
A successful end-of-tenancy clean is not about making a rental property look perfect for a few minutes. It is about carrying out a systematic clean that addresses the areas commonly examined during a property inspection while recognising the property’s original condition and reasonable wear and tear.
The most reliable approach is simple: work room by room, clean from high surfaces down, pay attention to hidden areas, use suitable products and compare the finished property with the original condition report.
For tenants preparing for End of Tenancy Cleaning Perth, preparation can make the difference between a rushed final clean and a controlled handover. Whether you clean independently or use professional end of lease cleaning Perth, understanding the expected standard allows you to check the work properly and deal with overlooked areas before the final inspection.
A clean rental should not merely look tidy—it should demonstrate that the property has been carefully and responsibly prepared for its next stage.
FAQ: End of Tenancy Cleaning Perth
1. What should be included in End of Tenancy Cleaning Perth?
A comprehensive end-of-tenancy clean generally covers the major living spaces, kitchen, bathrooms, bedrooms, laundry and applicable outdoor areas. Depending on the property and agreed scope, it can include ovens, cupboards, wardrobes, windows, skirting boards, floors, fixtures and other accessible surfaces.
The important point is that the exact scope should be confirmed rather than assumed. A standard cleaning package may not automatically include specialised carpet cleaning, exterior windows, gardening or pest-related work.
2. Is professional end of lease cleaning Perth necessary?
Not necessarily. A tenant can clean the property personally if they have sufficient time, equipment, knowledge and attention to detail.
However, professional cleaning can be useful when the property is large, heavily used, time is limited or detailed areas such as ovens, bathrooms and window tracks require substantial work.
The decision should be based on the property’s condition and the tenant’s ability to meet the required cleaning standard—not simply on the assumption that professional cleaning is always required.
3. Should I clean the property according to the original condition report?
Yes. The original condition report is one of the most useful references available to a tenant.
It helps establish what the property was like at the beginning of the tenancy and can help distinguish ordinary wear and tear from avoidable dirt or changes in condition.
Before the final inspection, compare rooms systematically rather than relying on memory.
4. Are outdoor areas included in an end-of-lease clean?
They may be, depending on the property, tenancy obligations and agreed cleaning scope.
Balconies, patios, courtyards, garages, entrances and garden areas should be checked before handover. However, cleaning and gardening are not always the same service, and specialised outdoor maintenance may need separate attention.
Review the tenancy agreement and property-management instructions if you are uncertain.
5. What is the biggest mistake tenants make before a final inspection?
One of the biggest mistakes is focusing on visible surfaces while ignoring detail areas.
Tenants often clean the floors, kitchen benches and bathroom surfaces but forget oven interiors, cupboard shelves, window tracks, skirting boards, door frames, exhaust fans and wardrobe interiors.
A room-by-room checklist is therefore more reliable than simply cleaning until the property “looks good.”